Creation of New Job Records
Interactive Tour:
Guide: Creation of New Job Records (47 Steps)
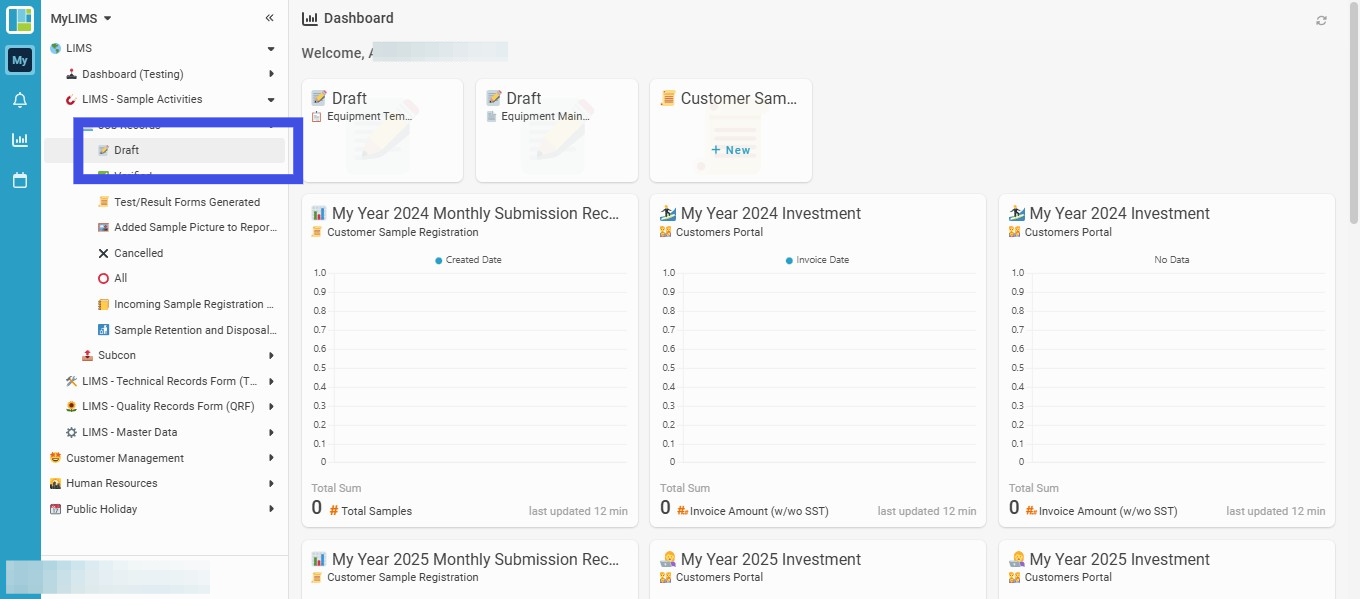
Step 1: Click on 'LIMS'
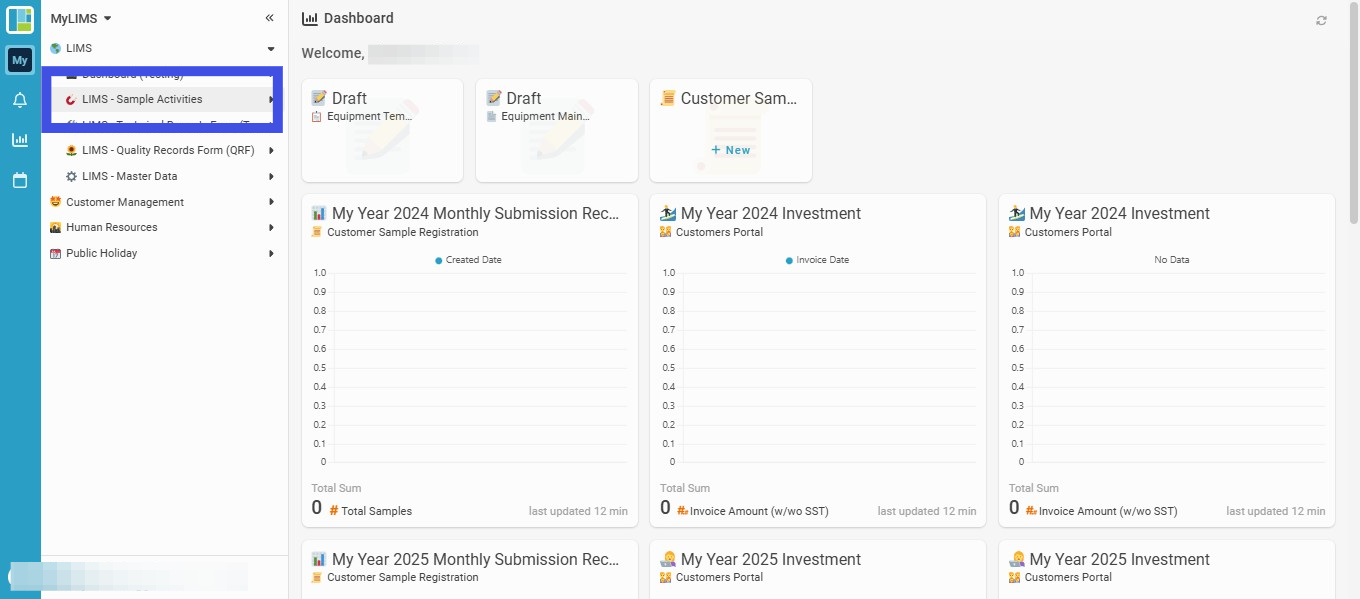
Step 2: Click on 'LIMS - Sample Activities'
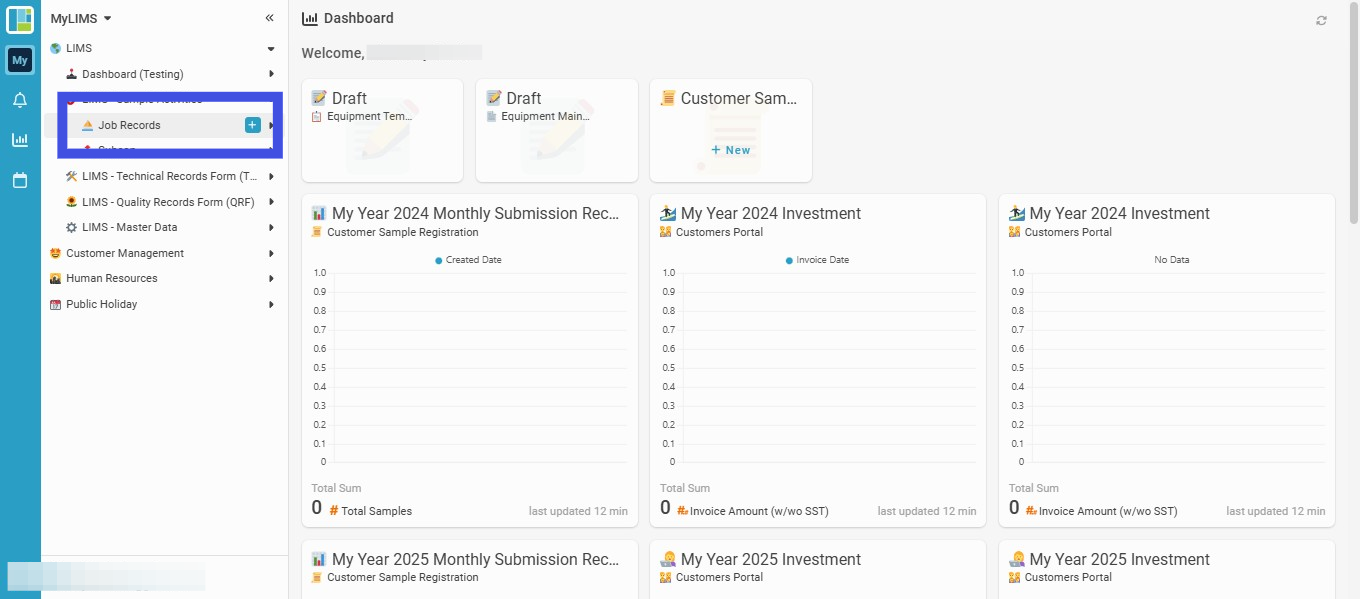
Step 3: Click on 'Job Records'
Step 4: Navigate to the 'Draft' Listing
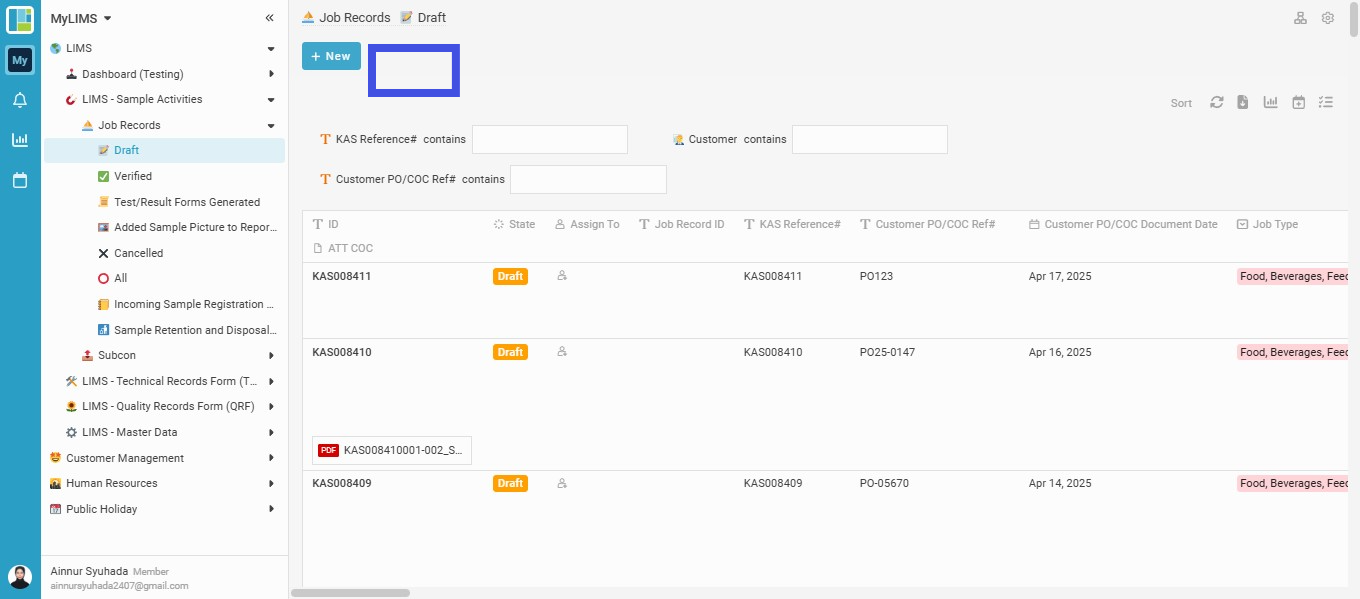
Step 5: Click on the 'New' button to create a new record
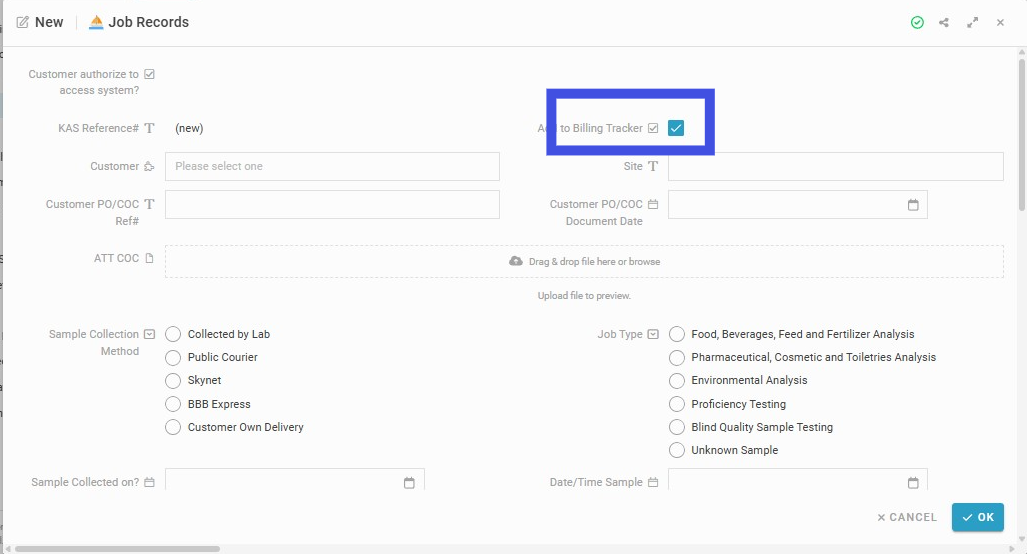
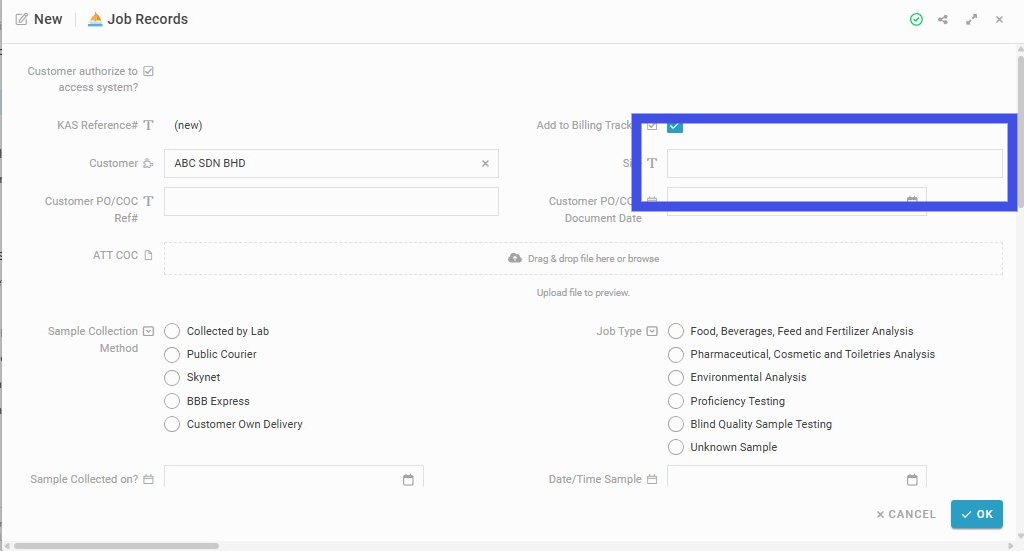
Step 6: Let the 'Add to Billing Tracker' tick box be checked (if you want to make a billable Job Record)
-
Uncheck the 'Add to Billing Tracker' box if the Job Records are unbillable.
-
'Proficiency Testing' & 'Blind Quality Sample Testing' are the unbillable job types.
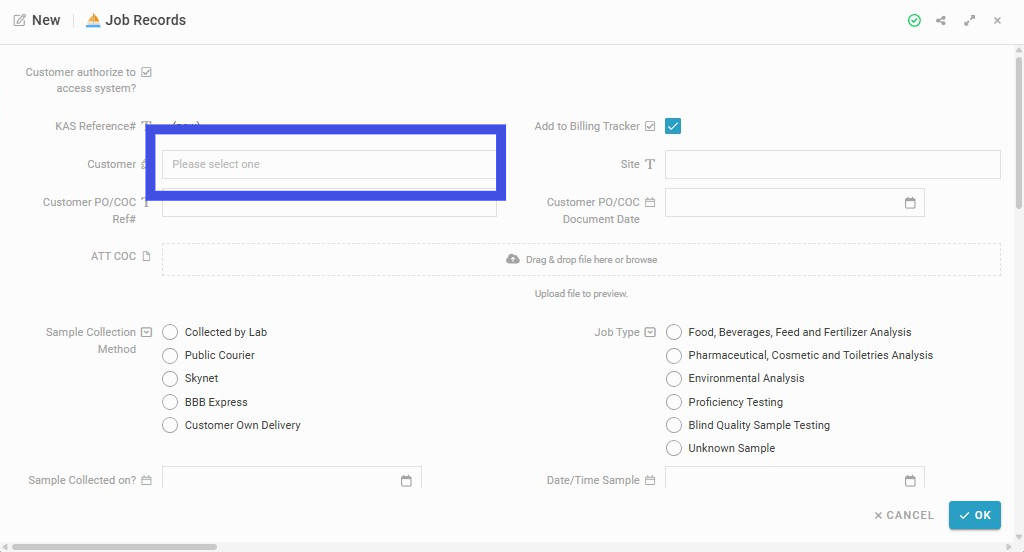
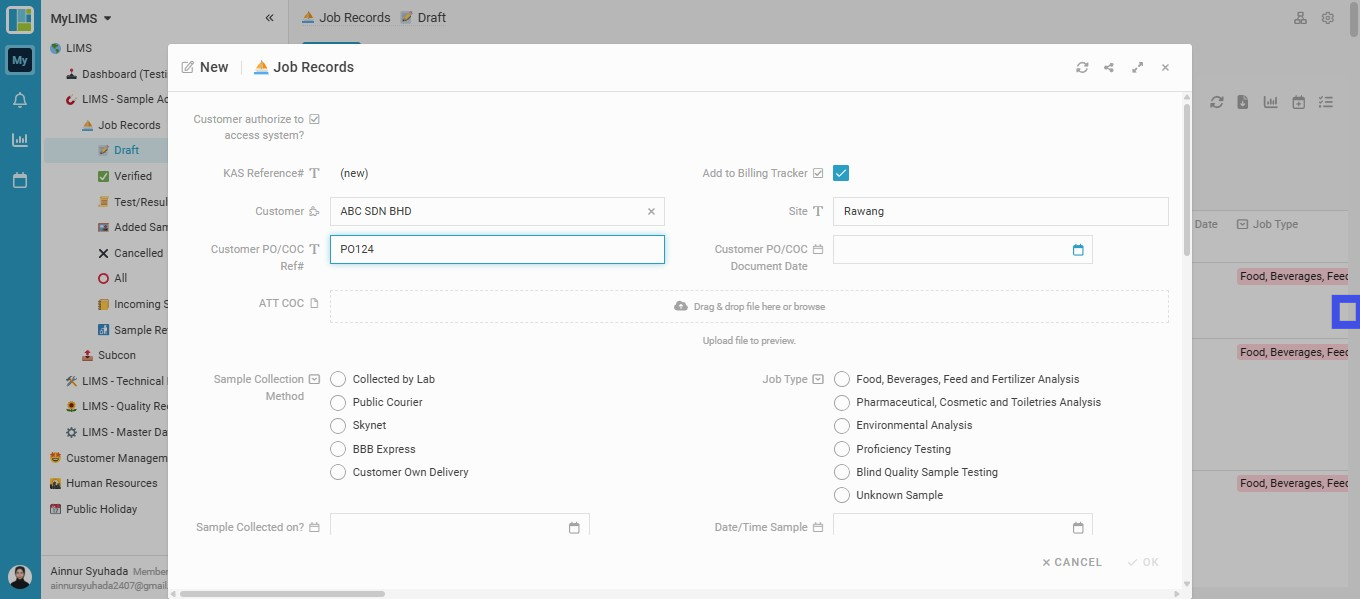
Step 7: Pick a Customer name from the dropdown of the field 'Customer'
Step 8: Insert the location 'Site', especially for customers that has many branches/sites
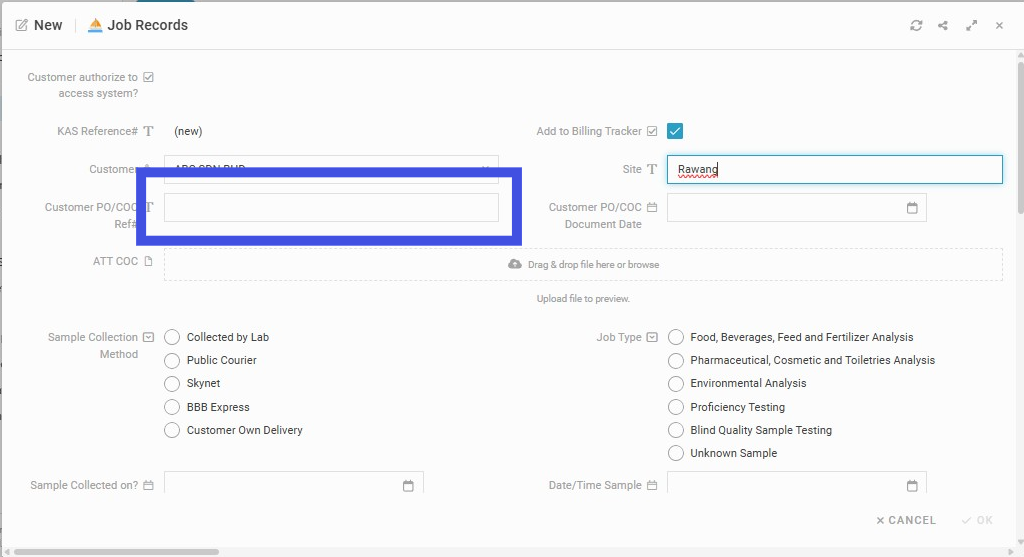
Step 9: Insert 'Customer PO/COC Ref#'
If there is a PO/COC Reference Number, enter it in the 'Customer PO/COC Ref#' field.
Tips ...
PO: Purchase Order COC: Chain-of-Custody
You may leave the field 'Customer PO/COC Ref#' blank if you don't have any reference number for PO/COC.
Step 10: Choose a date on the calendar for 'Customer PO/COC Document Date'
Tips ...
PO: Purchase Order COC: Chain-of-Custody
You may leave the field 'Customer PO/COC Document Date' blank if you don't have a PO/COC.
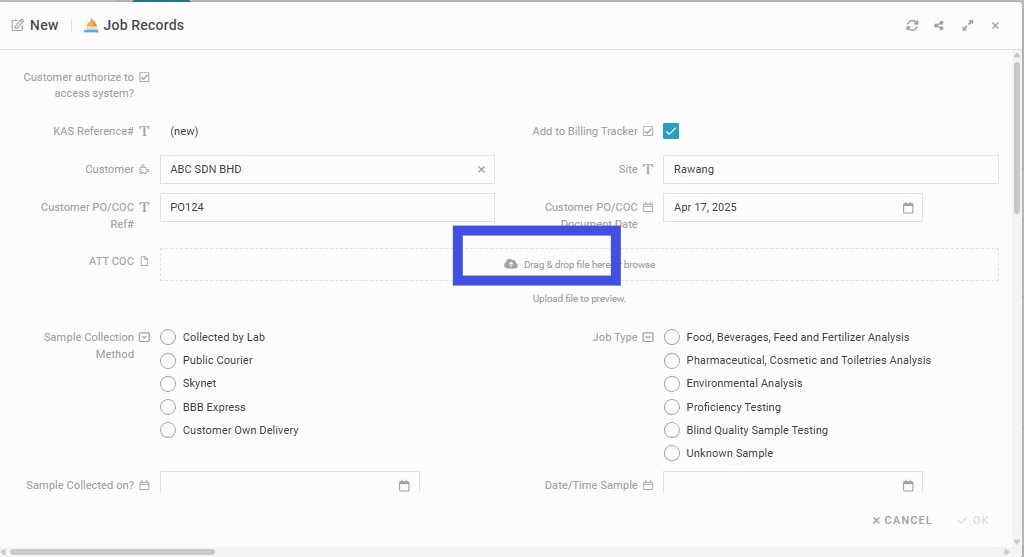
Step 11: Attach the Purchase Order (PO)/ Chain-of-Custody (COC) document to the field 'ATT COC'
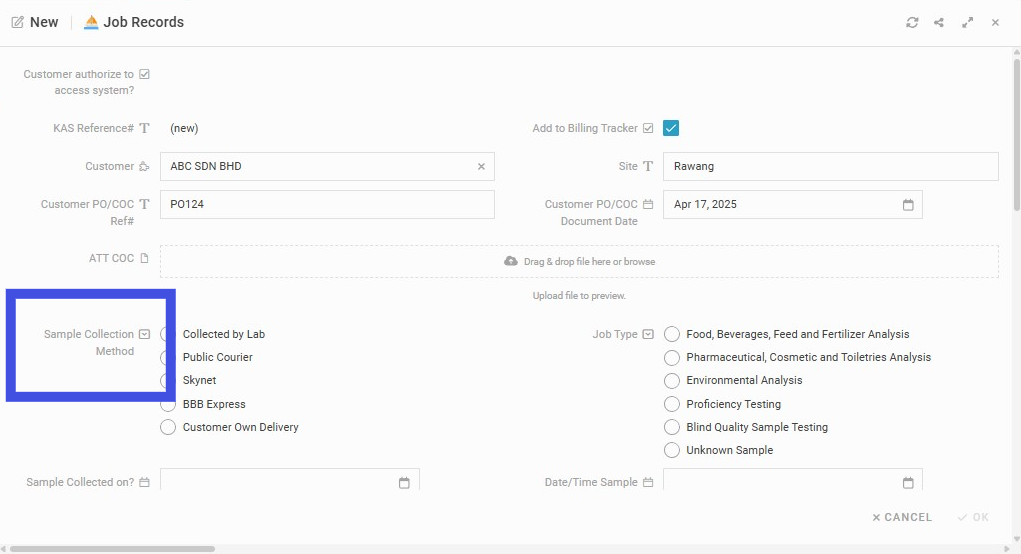
Step 12: Choose 'Sample Collection Method'
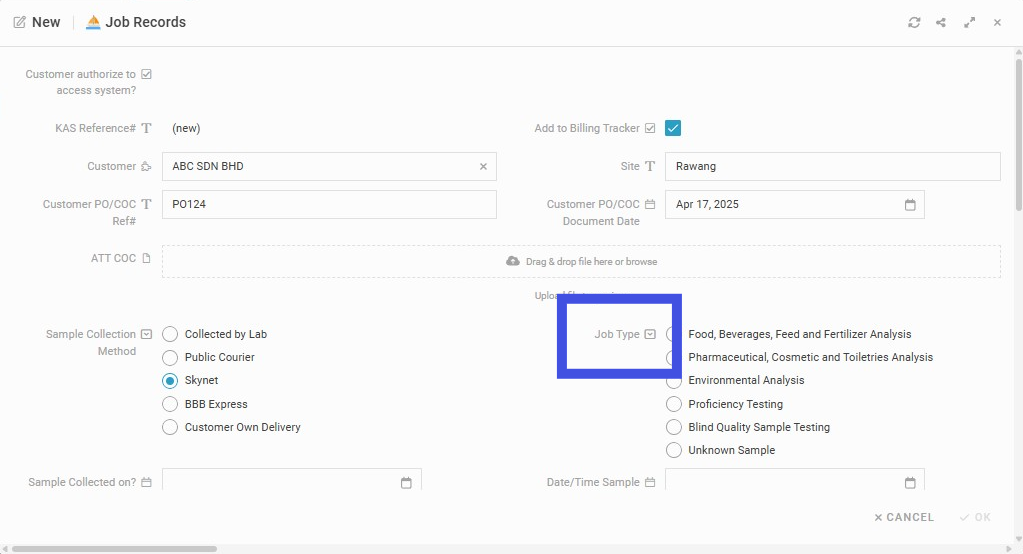
Step 13: Select 'Job Types'
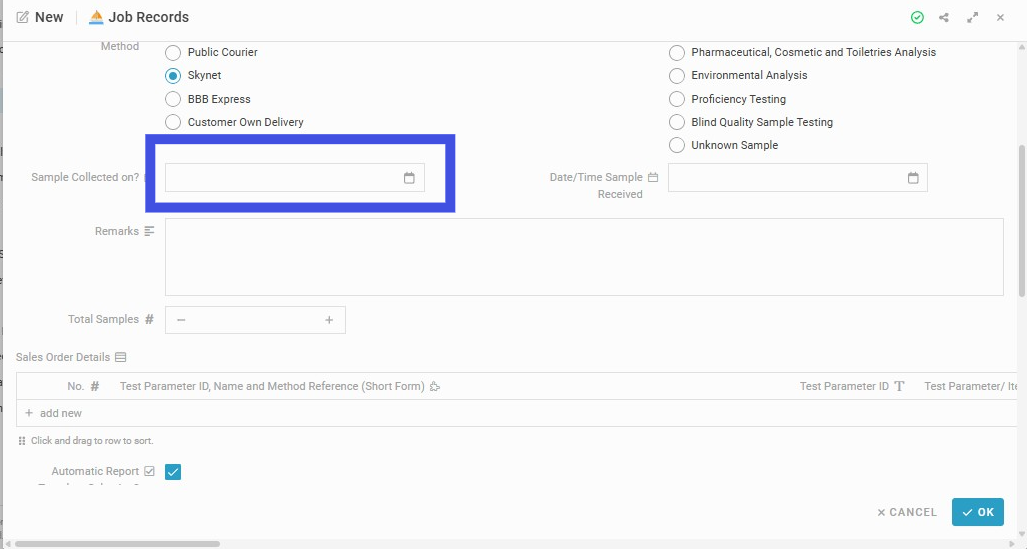
Step 14: Select Sample Collection Date on Calendar from the field 'Sample Collected on?'
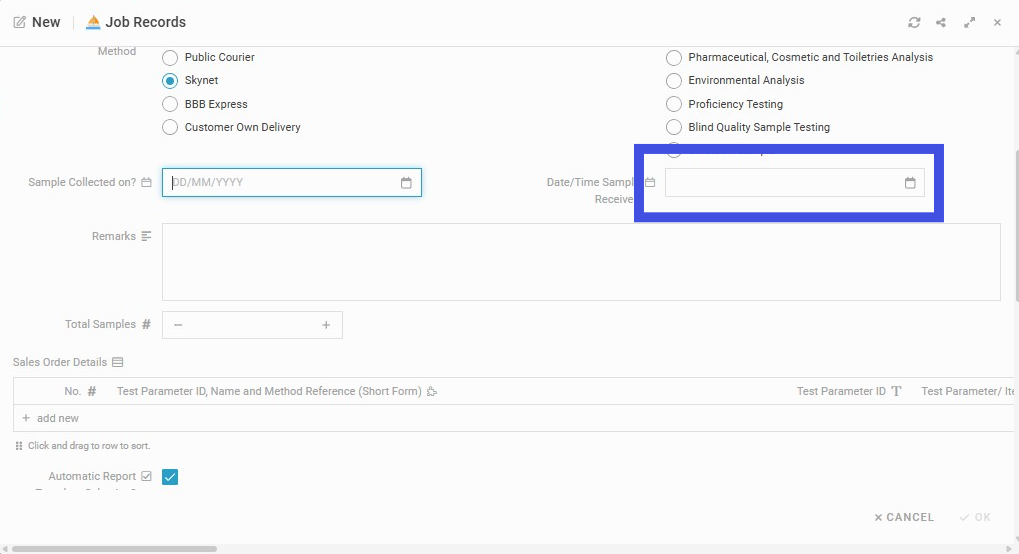
Step 15: Select 'Date/Time Sample Received' from the Calendar
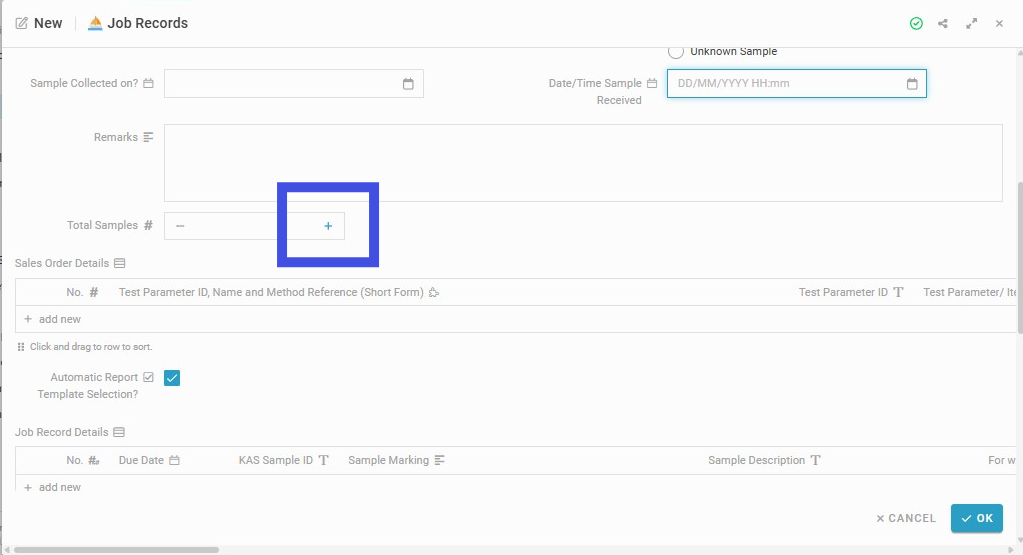
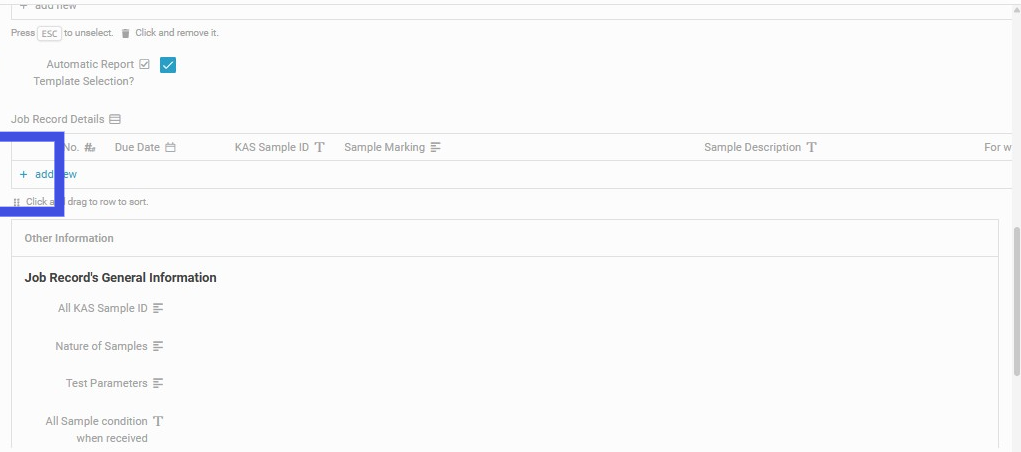
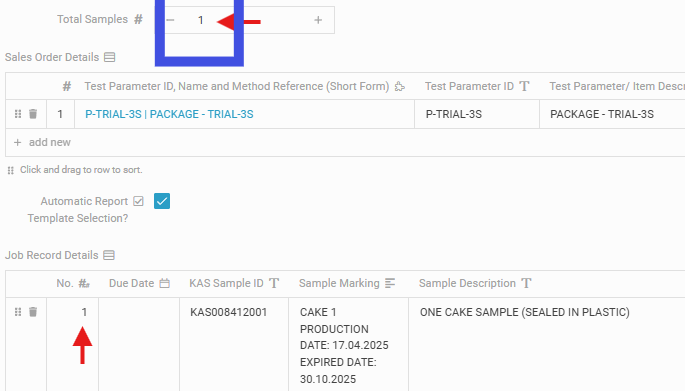
Step 16: Click the (+) button to add the quantity of the 'Total Samples'
The (new) row in the Job Record Details table will be added automatically based on the total number of samples added here, ONCE. If you wish to edit the quantity of "Total samples" after that, you may manually add/ reduce the rows in the Job Record Details table.
Step 17: Click on 'add new' to assign a test with a sample
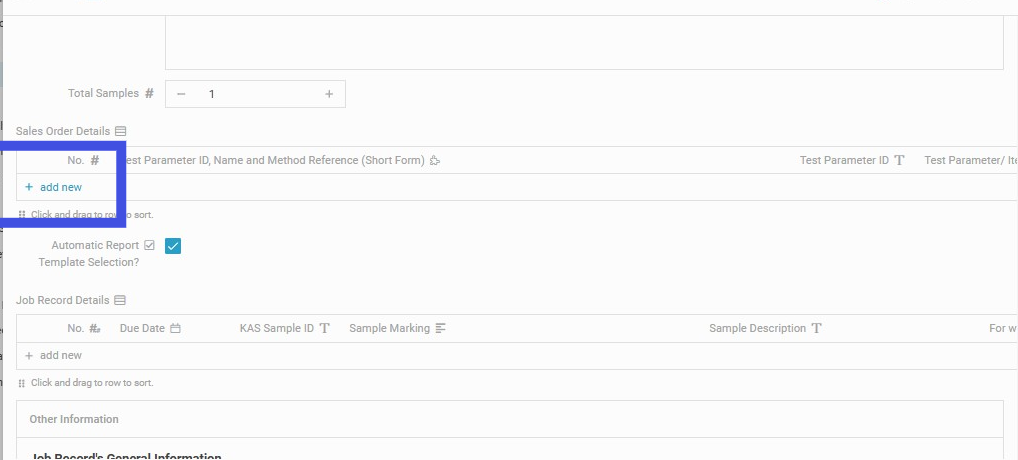
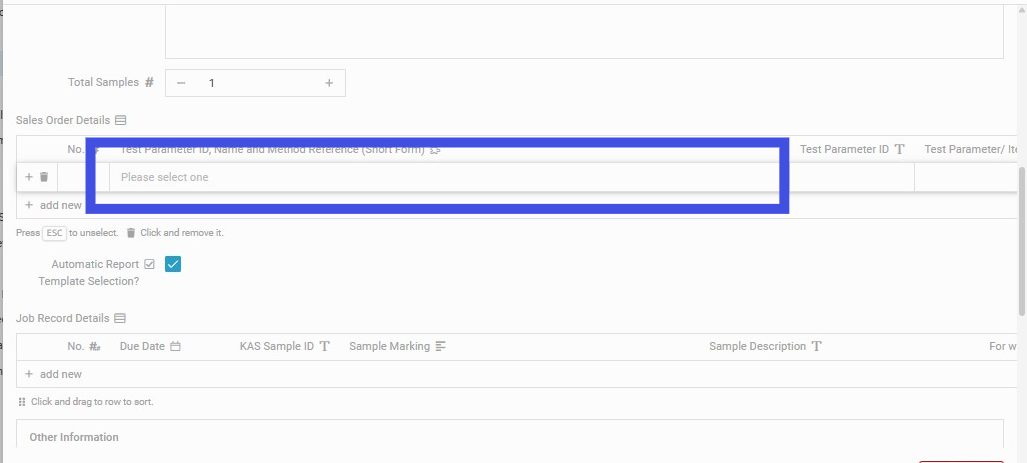
Step 18: Select from the column's dropdown 'Test Parameter ID, Name, and Method Reference (Short Form)' to assign the Tests to the respective Samples
Search test parameter ID/Name by typing short forms. Example: 'APC' for Aerobic Plate Count, 'TYM' for Total Yeast and Mold Count
Type customer name in short form for bundle test for specific customer and choose from the dropdown list 'Best' for Best Class (M) Sdn Bhd, 'ABC' for ABC SDN BHD.
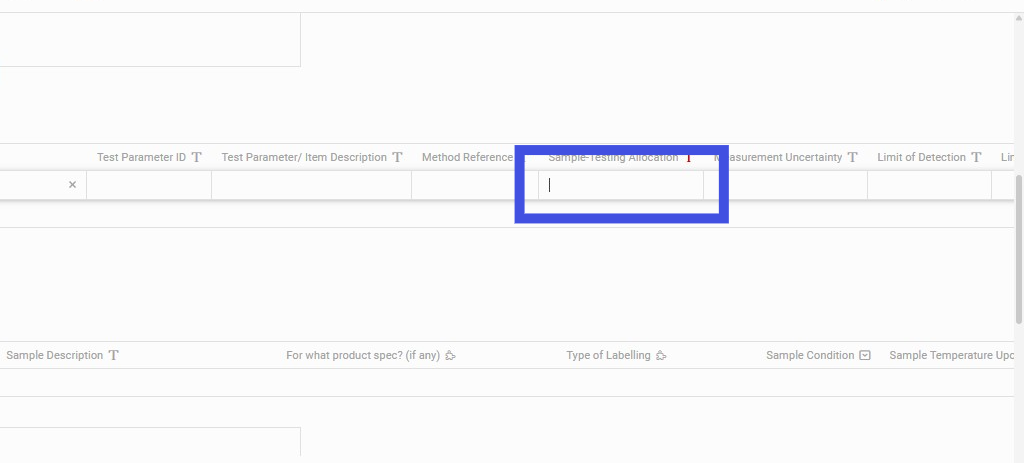
Step 19: Insert the sample number for the respective test into the field 'Sample-Testing Allocation'
Example: If the test ID is only allocated for sample number 1, key in 1. If the test ID is allocated for samples 1 and 2, key in 1,2. If many samples (≥10) are allocated for the same test ID/Package, creating multiple rows of the same test ID/Package is advised to prevent submission fail. E.g., Test/Package A, sample 1,2,3,4,5 Test/Package A, sample 6,7,8,9,10
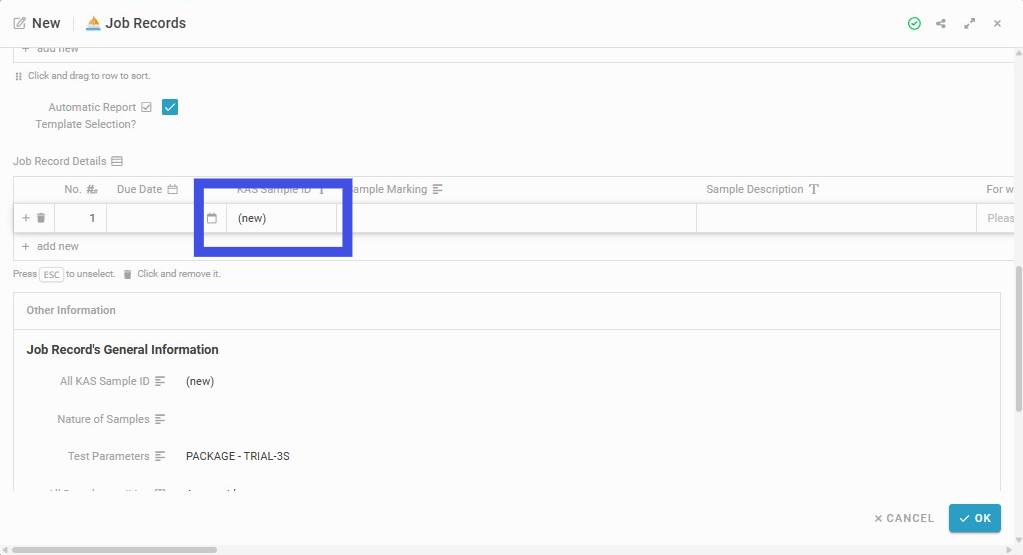
Step 20: Click (+) to add a sample in the 'Job Record Details' Table
Step 21: In the Job Record Details table, '(new)' will appear in the 'KAS Sample ID' column
The sample ID (KAS006101001, KAS006101002, etc.) will only be shown after the new Job Records are saved. The KAS Sample ID number will follow the number of registered samples.
E.g., if three samples are registered, KAS Sample ID will be KAS006101001, KAS006101002, KAS006101003.
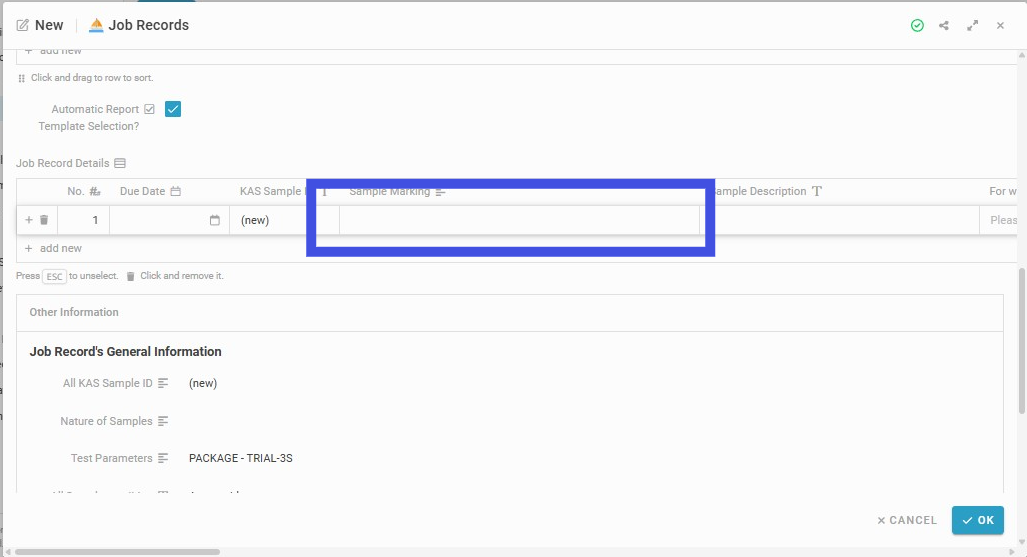
Step 22: Insert information to the field 'Sample Marking'
Example: SAUCE 1 PRODUCTION DATE: 17.04.2025 EXPIRED DATE: 30.10.2025
Ensure the sample name is written exactly as stated in the POC/COC.
-
Include other crucial information, such as the sample name, production date, batch number, expiration date, and sample condition ...
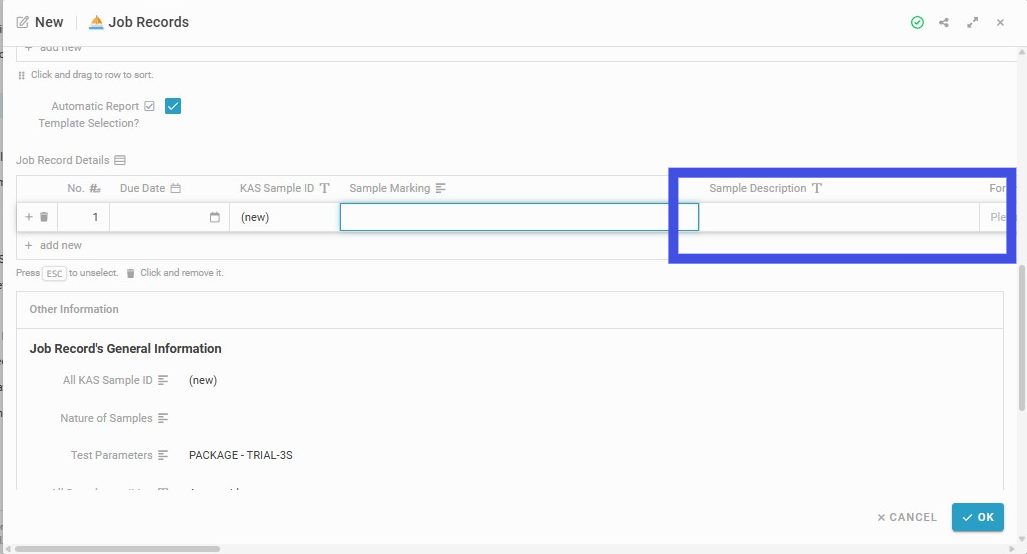
Step 23: Insert information into the field 'Sample Description'
Example: ONE CAKE SAMPLE (SEALED IN PLASTIC)
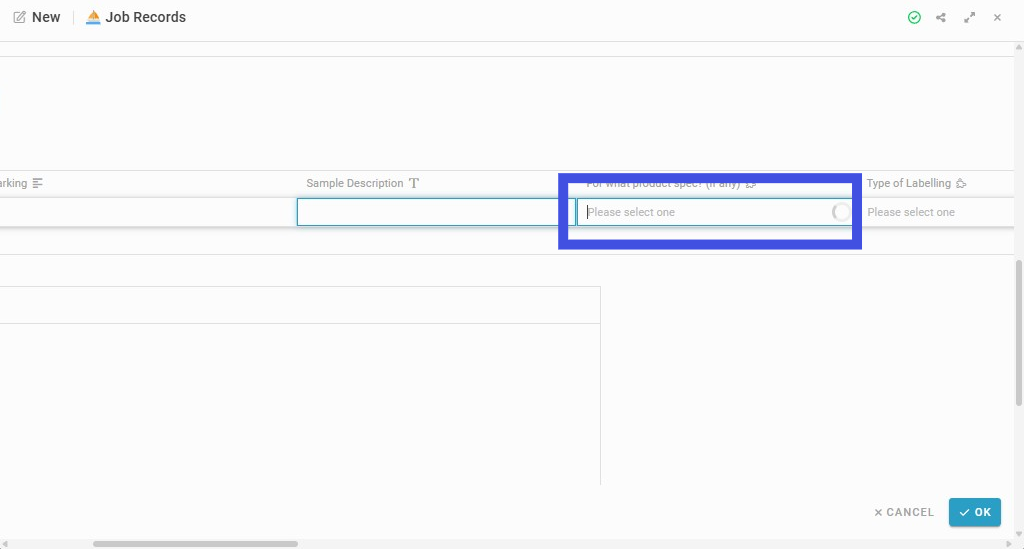
Step 24: Choose product spec from the dropdown of the field 'For what product spec (if any)'
Some customers have specific product specs to include in the report. Based on the customer's samples, choose a product spec.
Example:
-
Customer A | Chili Paste | Retort
-
General | Regulation spec (E.g., Drinking Water 25th Schedule as per Food Act Regulations)
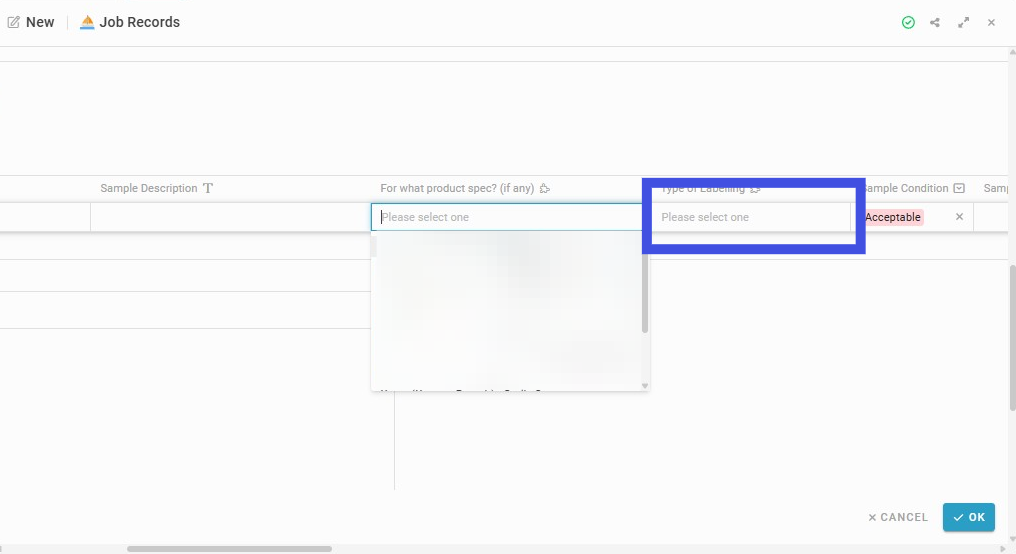
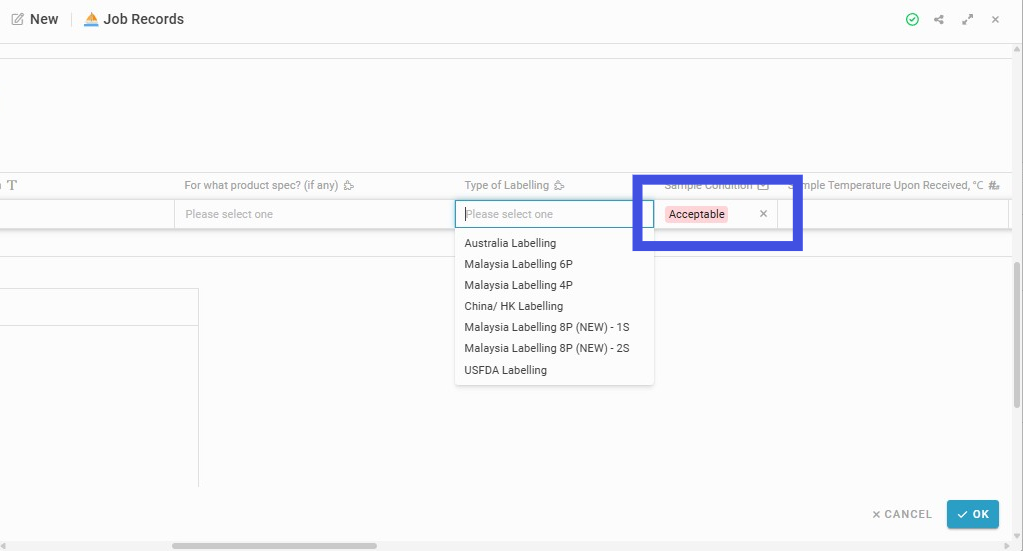
Step 25: Choose the Type of Labelling from the dropdown of the field 'Type of Labelling'
Some customers' reports need nutritional labelling. The report must include the nutritional labeling based on the type (USFDA, China/HK, Malaysia 4P, Malaysia 6P, etc.).
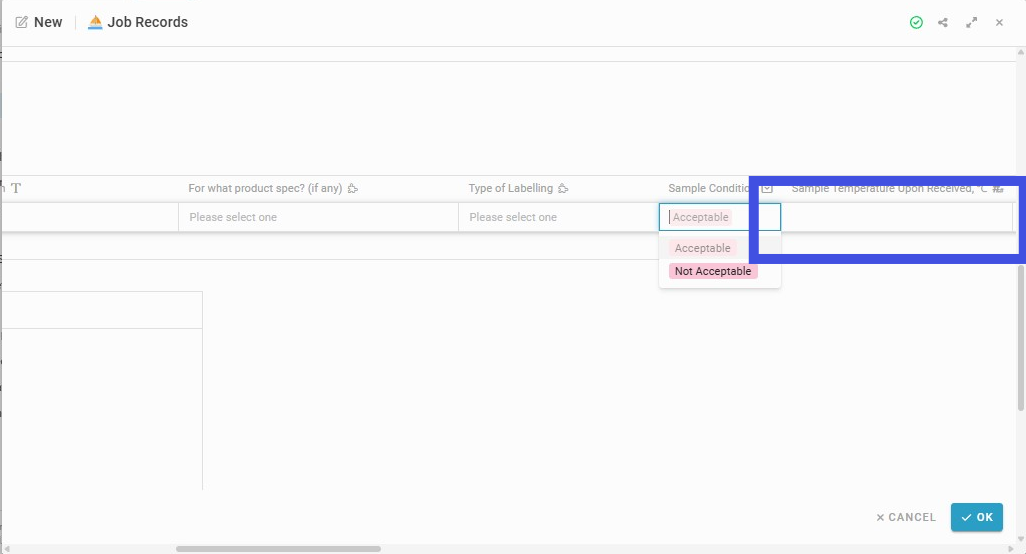
Step 26: Select from the dropdown field of 'Sample Condition'
Step 27: Insert information to the field 'Sample Temperature Upon Received'
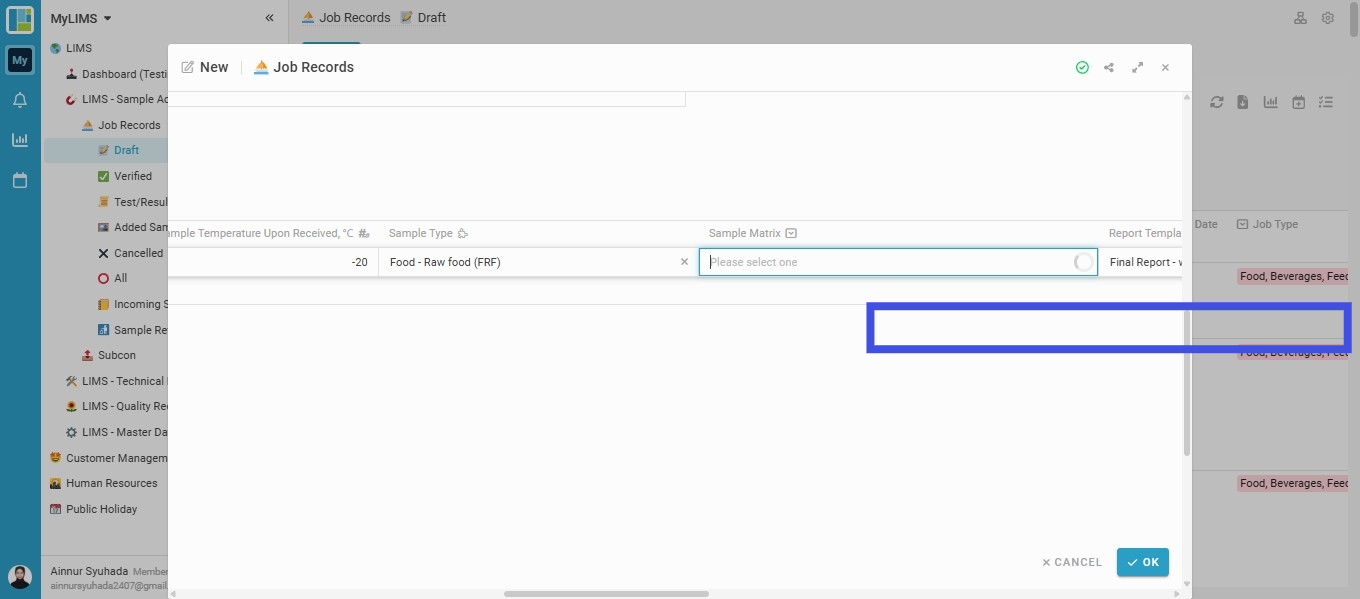
Step 28: Insert information to the field 'Sample Type'
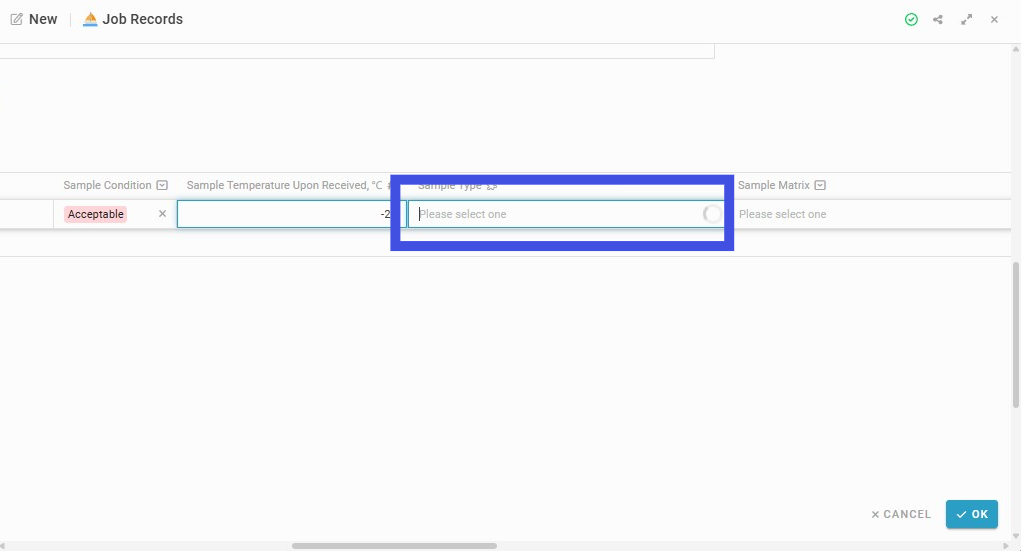
Step 29: Select the 'Sample Matrix', which is a dropdown dependent on the 'Sample Type'
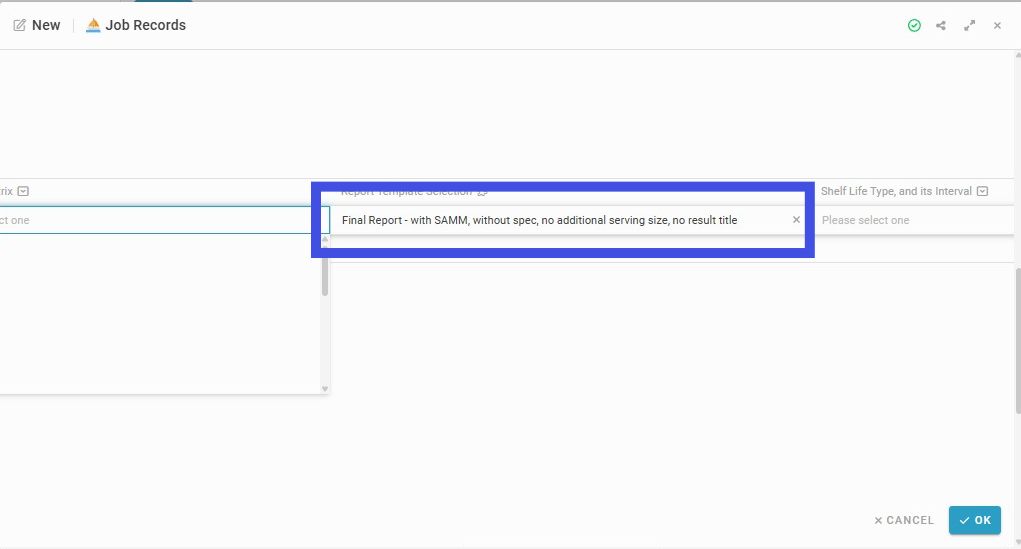
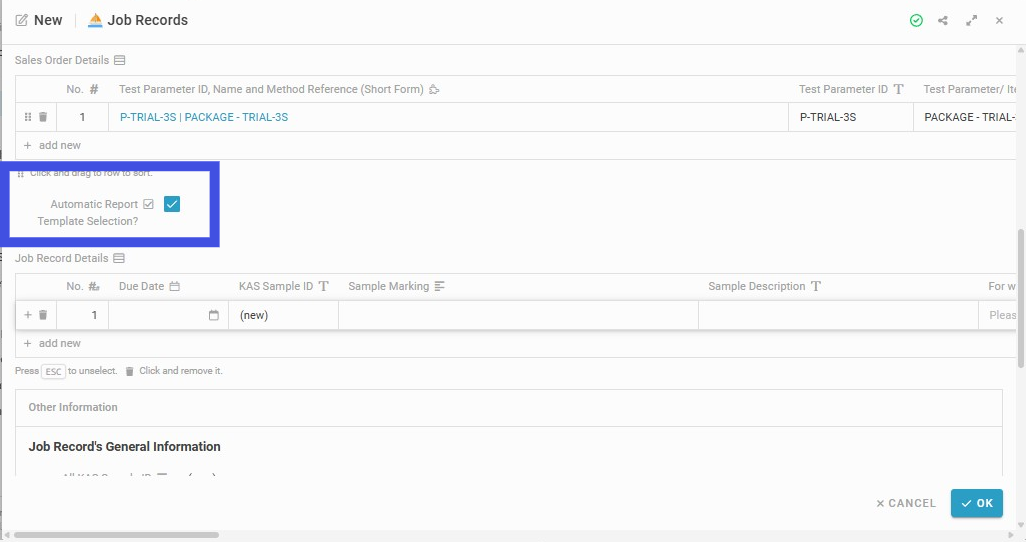
Step 30: Select Report Template from the dropdown field of 'Report Template Selection'
The report template is selected automatically by default. However, you can choose another template based on testing parameters, customer special requests, or reporting criteria.
Step 31: Uncheck the 'Automatic Report Template Selection?' tick box to select another report template
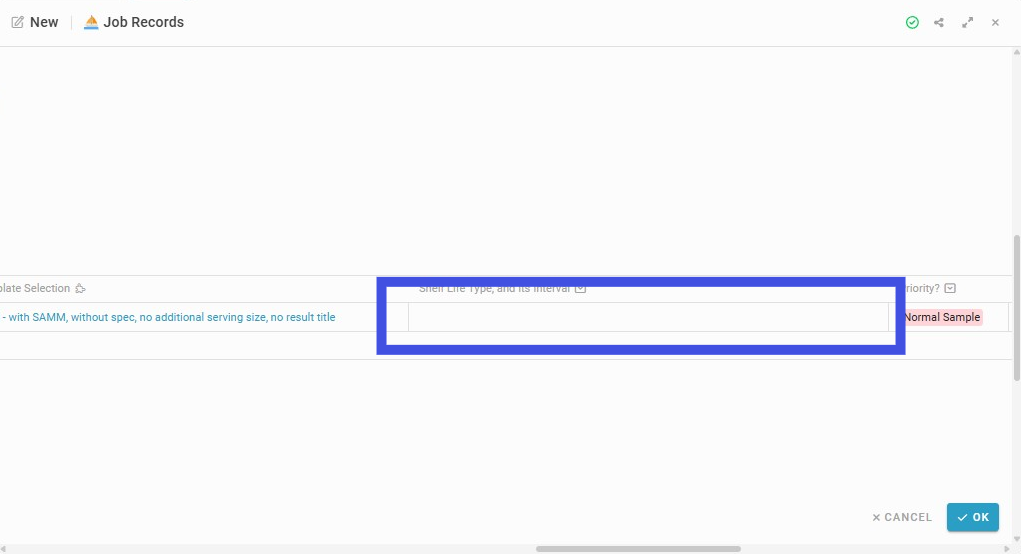
Step 32: Choose from the dropdown field of 'Shelf Life Type and its Interval' (for shelf life testing)
Choose/indicate the sample's shelf life type, whether Accelerated Shelf Life or Real Time Shelf Life, and the interval for every sample registered.
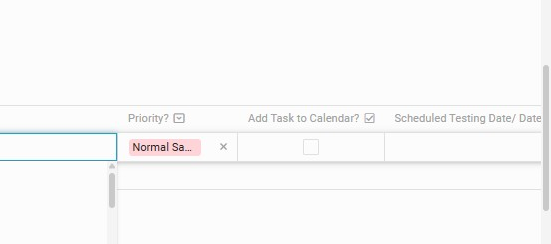
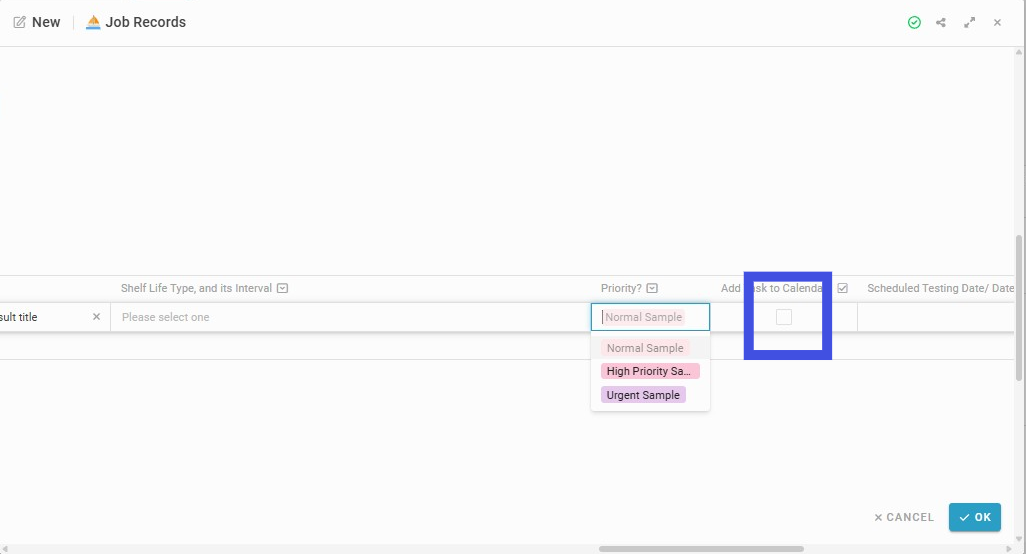
Step 33: Select the Sample 'Priority?'
When registering a new sample, "Normal Sample" will appear by default. Click the box to choose a different sample priority, such as "High Priority" or "Urgent."
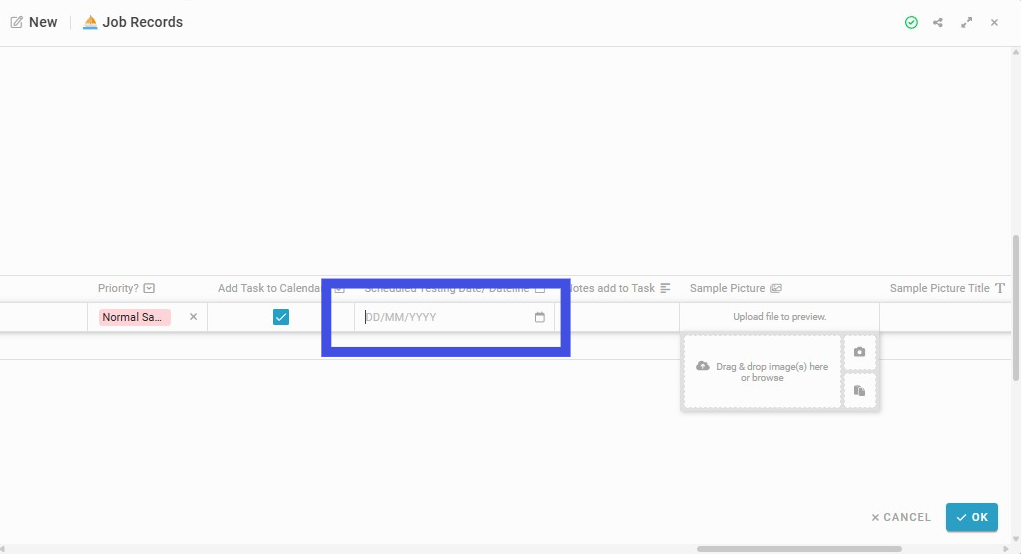
Step 34: Tick the check-box of the field 'Add Task to Calendar' to add the Task to the Calendar
Adding Tasks to the Calendar is needed for daily operation planning and follow-up activities, especially for Urgent and High-Priority Samples. This task will appear on Task Management on its Scheduled Testing Date/Deadline.
Step 35: Choose a date on the 'Scheduled Testing Date/ Dateline' to schedule testing
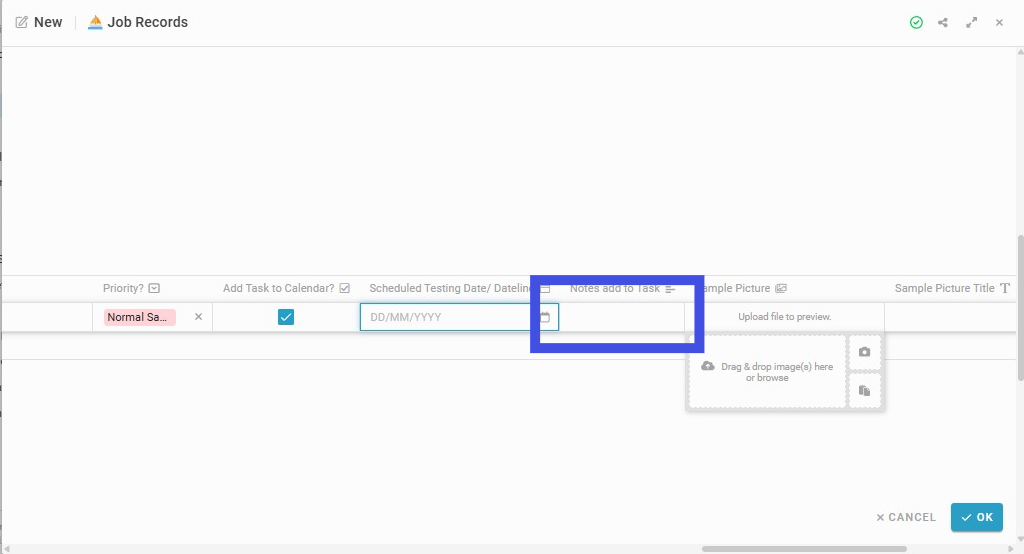
Step 36: Insert notes for the field 'Notes add to Task' if any
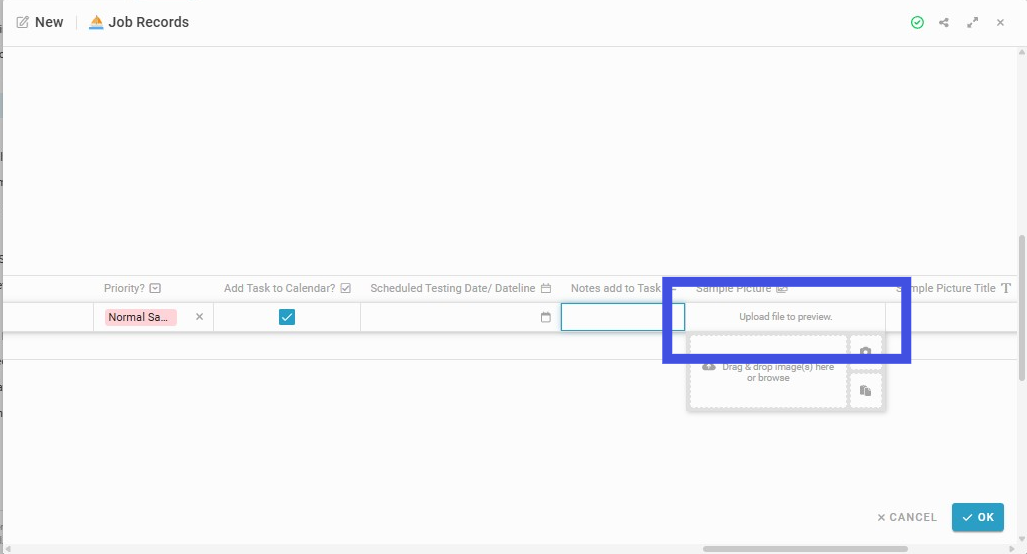
Step 37: Upload Sample Picture to the field 'Sample Picture' (if any)
If necessary, a sample picture captured during the sample receipt will be added to the report.
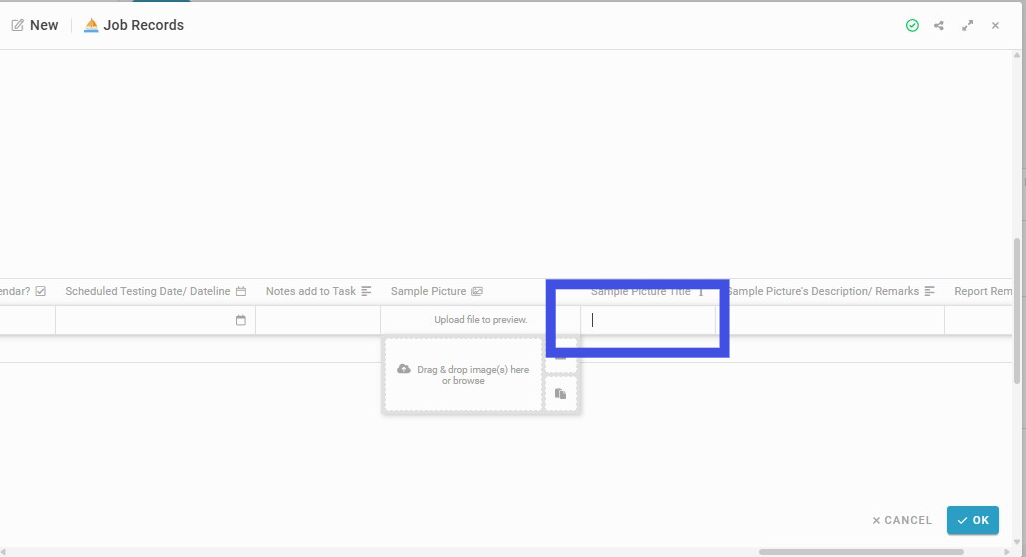
Step 38: Insert the Sample Picture Title (if any) into the field 'Sample Picture Title'
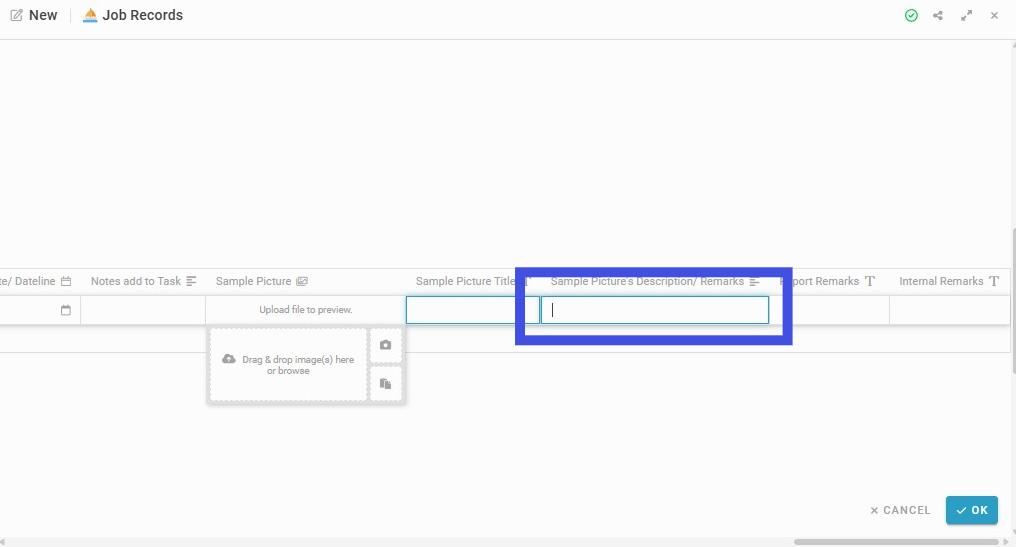
Step 39: Insert Sample Picture's Description/Remark (if any) to the field 'Sample Picture's Description/Remarks'
Step 40: Insert Report Remarks (if any) to the field 'Report Remarks'

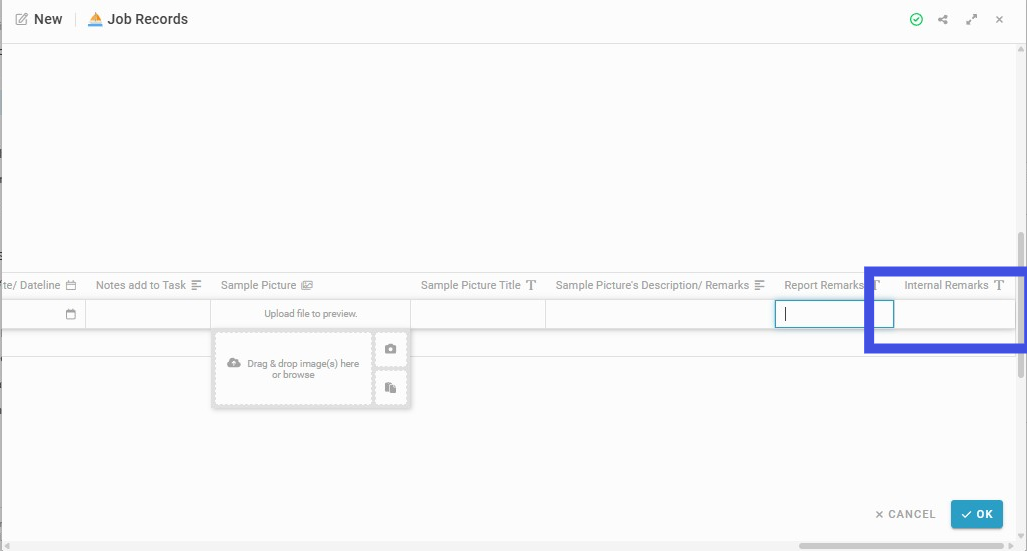
Step 41: Insert Internal Remarks (if any) into the field 'Internal Remarks'
Internal Remarks will not be shown in the report. These are just internal remarks for samples only.
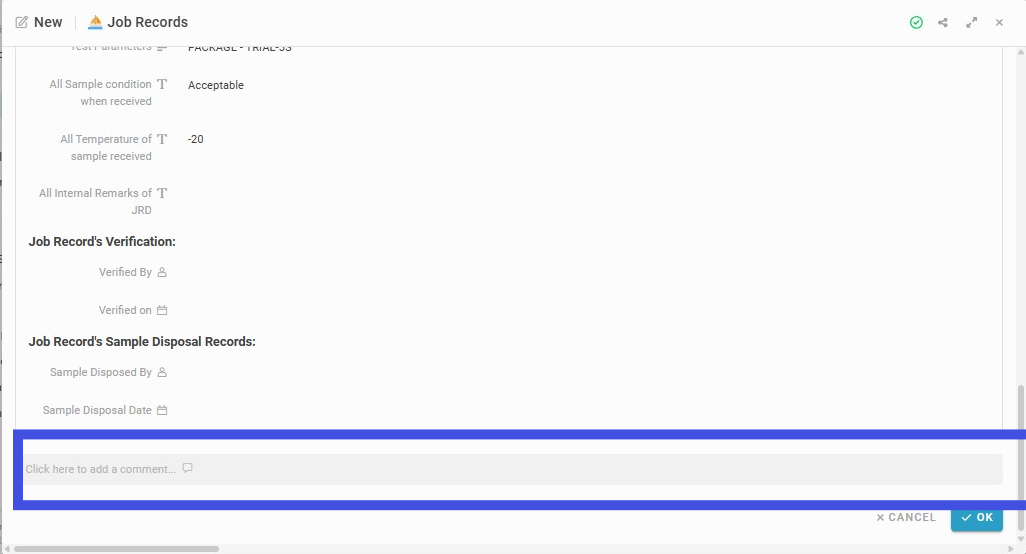
Step 42: Post comments here (if any)
Comments will appear on the right sidebar after saving the Job Record in 'View'. You can also mention others by typing @ and their name in the comment section.
Step 43: Ensure the 'Total Samples#' and the 'Total Number of Samples' in the 'Job Record Details' Table match.
Ensure the 'Total Samples#' and 'Total Number of Samples' in the Job Record Details Table match. Otherwise, the Job Record cannot be saved when clicking 'OK'.
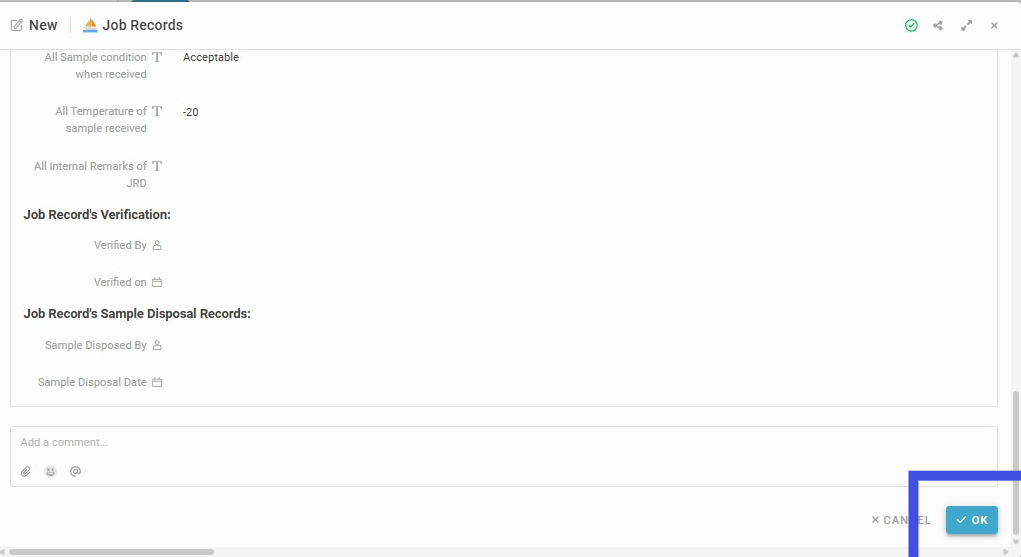
Step 44: Click on 'OK' after filling in the details
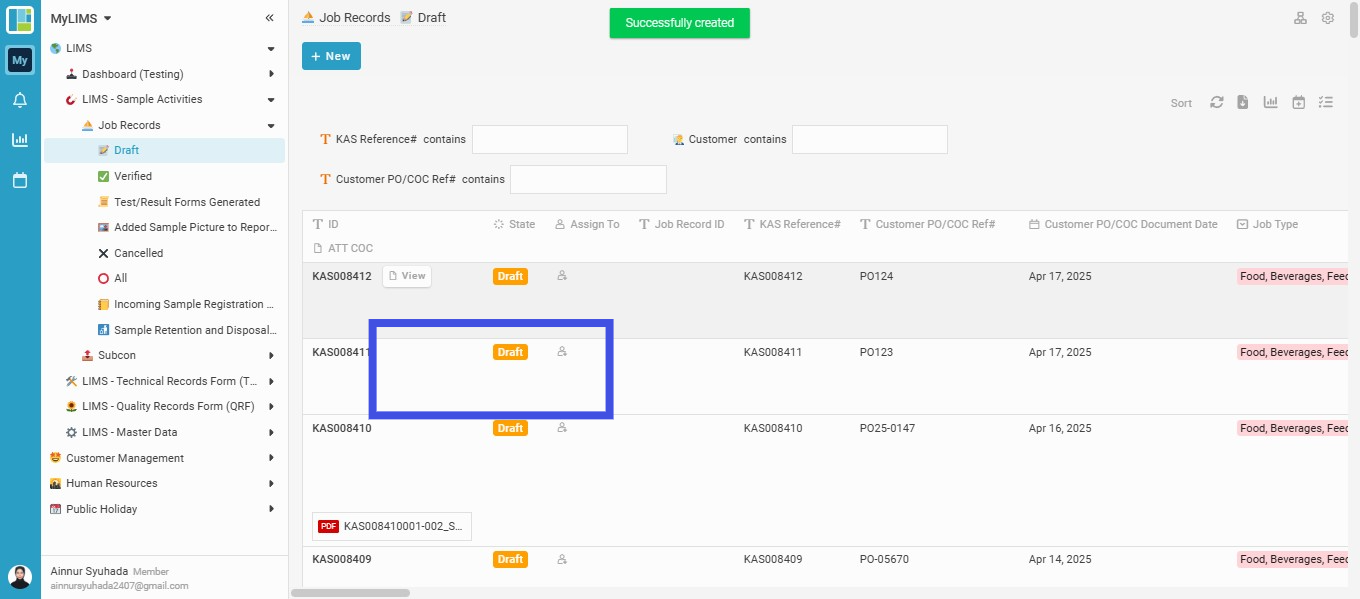
Step 45: Find the new Job Record here
Step 46: Navigate to the 'View' button beside the 'State' column, and click to view the Job Record

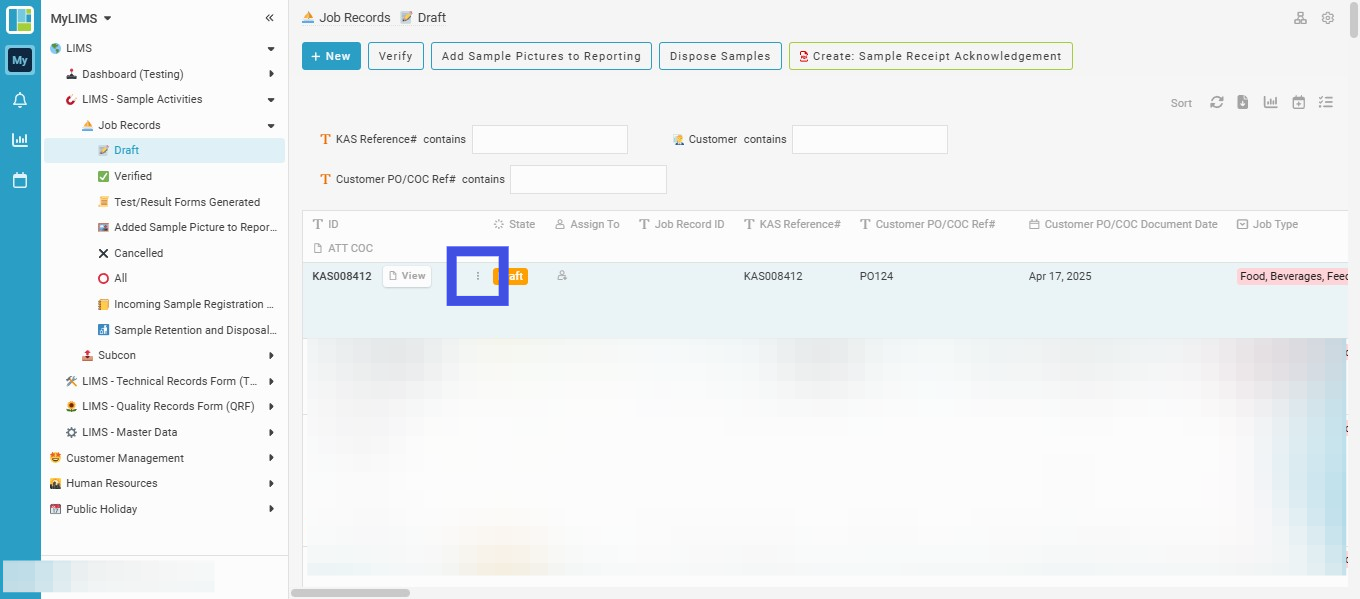
Step 47: The Job Record can be edited by clicking the 'three-dot' button and selecting 'Edit'